How to Install Garden Lighting in 5 Simple Steps
Garden lighting is important for both the functionality and aesthetics of your outdoor space, but achieving the perfect setup can be challenging. Poor lighting can leave your garden unusable in the evening and fail to showcase its beauty, while improper installation can create safety hazards.
In this guide, we will walk you through how to install garden lighting in 5 simple steps. By following these straightforward steps, you can extend the usability of your garden into the evening hours, highlight your landscaping features, and create a welcoming ambiance. Moreover, you can enhance safety by properly illuminating pathways and potential hazards.

Garden Lighting Installation Process
Installing garden lighting involves careful planning, gathering the right tools and materials, understanding electrical requirements, positioning the lights strategically, and conducting thorough testing. Following these steps will ensure a successful installation, resulting in a beautifully lit garden.
Step 1: Planning Your Garden Lighting Layout
Before starting the installation, assess your garden to determine which areas need lighting. Consider pathways, patios, water features, and garden beds. Identify focal points you wish to highlight and areas requiring functional lighting for safety and navigation.
Selecting the Right Type of Lights
Choose lighting fixtures based on your garden’s needs and aesthetic preferences. Options include solar lights, LED fixtures, and low-voltage lighting. Each type offers different benefits in terms of energy efficiency, brightness, and ease of installation. Match the lighting style to your garden’s overall design theme.
Step 2: Gathering Necessary Tools and Materials
Prepare a toolbox with essential items such as a shovel, wire cutters, a voltage tester, screwdrivers, and a drill. Having these tools readily available will streamline the installation process and help you handle any unexpected challenges.
Recommended Materials and Lighting Options
In addition to lighting fixtures, gather materials like weather-resistant cables, connectors, and waterproof junction boxes. Opt for high-quality, durable lights that can withstand outdoor conditions. LED lights are particularly popular for their longevity and energy efficiency.
Step 3: Installing the Electrical Components
Familiarize yourself with the electrical requirements of your chosen lighting system. Ensure you have a power source close to the garden and that your home’s electrical system can handle the additional load. For low-voltage systems, a transformer will be necessary to step down the voltage from your home’s power supply.
Safe and Effective Wiring Techniques
Safety is paramount when working with electricity. Bury cables at least 6 inches underground to protect them from damage. Use waterproof connectors to join wires and protect connections from moisture. If you’re unsure about any electrical aspect, consult a professional electrician to avoid potential hazards.
Step 4: Positioning and Securing the Lights
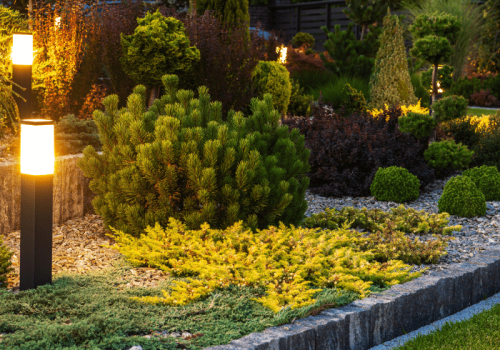
Position lights to highlight key features and create depth in your garden. Use uplights to accentuate trees and tall plants, while pathway lights can guide visitors along walkways. Experiment with different angles and positions to achieve the desired visual effect.
Securing Lights to Withstand Weather Conditions
Ensure that all fixtures are securely installed to withstand wind, rain, and other weather conditions. Use stakes to anchor pathway lights firmly into the ground and mount wall lights with appropriate brackets. Regularly check and tighten any loose fixtures to maintain stability.
Step 5: Testing and Adjusting the Lighting
Once the lights are installed, test the system to ensure all fixtures are functioning correctly. Turn on the lights at dusk to see how they look in the evening and identify any areas that may need adjustment.
Fine-Tuning for Optimal Performance
Adjust the positioning of the lights as needed to achieve the perfect balance of illumination. Ensure that the lighting is not too harsh or too dim and that it enhances the garden’s features without creating glare or dark spots. Small adjustments can make a significant difference in the overall ambiance.
Maintenance Tips for Garden Lighting
Regular maintenance will prolong the life of your garden lighting system. Clean the fixtures periodically to remove dirt and debris that can dim the lights. Check for any signs of wear or damage, especially after severe weather conditions, and replace any faulty components promptly.
Troubleshooting Common Issues
Address common issues such as flickering lights or non-functioning fixtures by checking the electrical connections and ensuring the power source is stable. If a light is not working, verify the bulb’s condition and replace it if necessary. Persistent problems may require professional assistance.
Enhancing Your outdoor Ambiance with Proper Garden Lighting
Installing garden lighting is a rewarding project that enhances the beauty and functionality of your outdoor space. By following the five simple steps—planning your layout, gathering tools and materials, installing electrical components, positioning and securing lights, and testing and adjusting—you can create a stunning and safe garden lighting setup.
Proper garden lighting transforms your outdoor area into a serene and inviting space. Whether you’re hosting evening gatherings, enjoying a quiet night outside, or simply admiring your garden’s beauty, well-placed lights add an enchanting touch. With regular maintenance, your garden lighting will continue to provide enjoyment and functionality for years to come.


